Description: Here I have define how to install ssl certificate on zimbra mail server


Zimbra mail server supports two possible ways of SSL installation:
- zimbra administration console (web interface)
- zimbra certificate manager (command line interface)
SSL certificate installation via Zimbra Administration Console
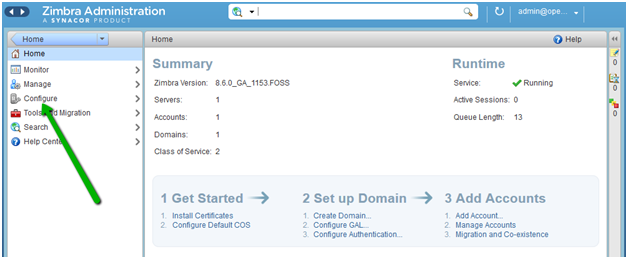
- Click on “Configure” from the left list of the main menu:

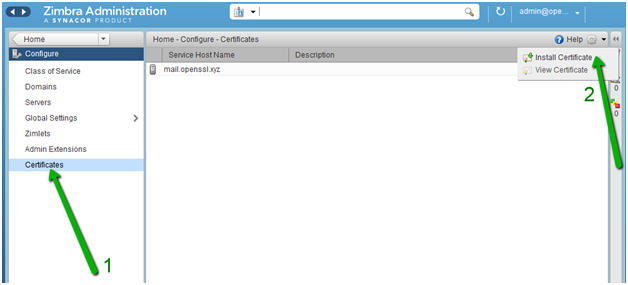
- In the next window, click on “Certificates” and pick the option “Install Certificate”:

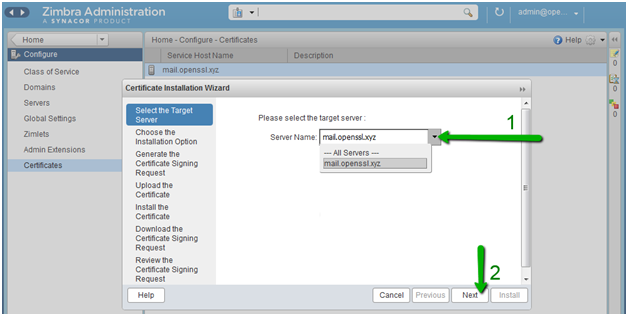
- You will see a separate window where you need to choose the required mail server. Click “Next” afterwards:
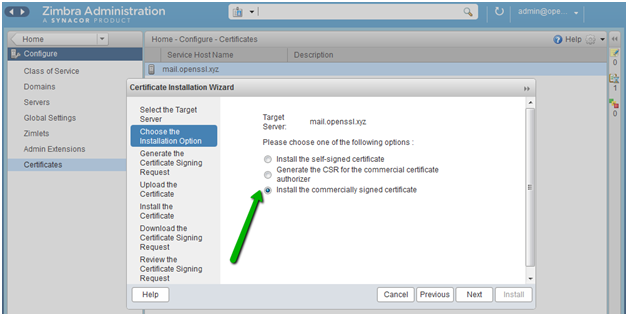
- Pick “Install the commercially signed certificate” option to start the installation process
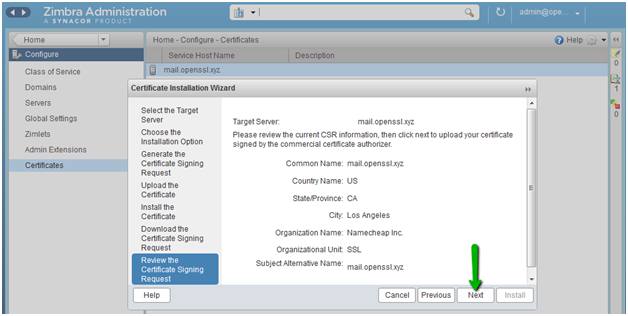
- Review all information that was used for CSR generation. If the information is correct, click on the “Next” button:
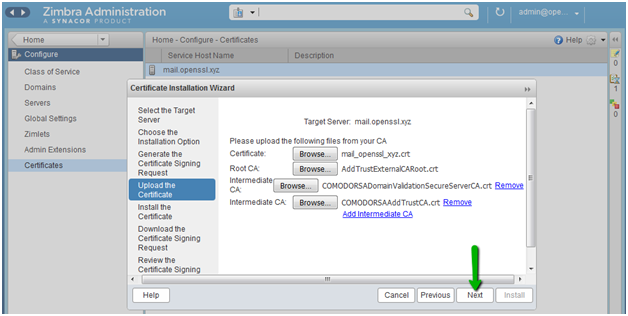
- Upload the SSL certificate file, root certificate and intermediate certificates received from the Certificate Authority
- When the SSL installation process is completed, you will see the notification:
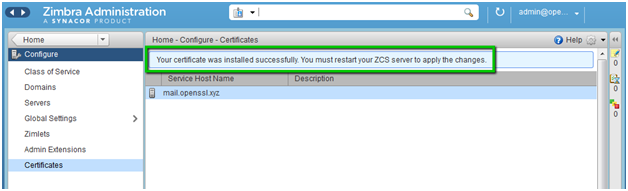
- To apply changes, You need to restart Zimbra service.
SSL certificate installation via Zimbra Certificate Manager (command line interface)
- A Zimbra package has the “zmcertmgr” tool to manage SSL certificates
- For version 8.6 or lower, this tool must be run as root. Run this command in the terminal to switch from the default user to the root:
- To start the installation process, you need to upload the SSL certificate file (server_domain_com.crt) and CA bundle file (server_domain_com.ca-bundle) to any folder to your hosting server on the temporary basis. For this example, SSL files have been uploaded to the /opt/certificate directory.
- Verify that your certificate received from the Certificate Authority matches the private key generated along with the CSR:
# /opt/zimbra/bin/zmcertmgr verifycrt comm/opt/zimbra/ssl/zimbra/commercial/commercial.key /opt/server_domain_com.crt /opt/certificate/server_domain_com.ca-bundle
- To deploy certificate run as follow:
# /opt/zimbra/bin/zmcertmgr deploycrt comm /opt/server_domain_com.crt /opt/certificate/server_domain_com.ca-bundle
- To verify installed certificate run below command :
#/opt/zimbra/bin/zmcertmgr viewdeployedcrt